|
 Circular
phased array probes Circular
phased array probes
Rotating electronic scanning

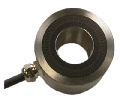
128 elts / 360° probe for axial emission with mirror
(not shown)

128 elts /360° probe radial angled emission

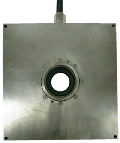
10 MHz 128 elts curved array for ERW tubes inspection

128 elts /360° phased array probe for wall thickness
measurement of 12mm ID tubes (axial emission with mirror)

Circumferential cracks detection / axial angled emission

Wall thickness measurement
(radial emission)
|
Principle
360° or sector electronic beam scanning
is combined with electronic focusing and beam steering
- Scanning speed can be adapted to the water path
- Focusing depth and inspection angle can be electronically
selected
More details about
phased array principle here >>
Typical use in immersion
Typical work with pulse echo technique
Applications
Full body tube
inspection from the outside
Welded tube inspection from the outside
Bar inspection from the outside
Tube inspection from
the inside
Advantages
High speed inspection
High inspection flexibility
Quick calibration and set-up between two batches
Typical configurations
See also the main
features of all array probes here >>
| |
Inspection from the outside |
Emission direction
Centre frequency
Nb of elements |
axial (with mirror) or radial
4 MHz to 18 MHz
32 to 512 |
Tube dimension
Cracks location
Cracks type |
15 mm to 100 mm OD
ID and OD
longitudinal and circumferential
wall thickness measurement |
| |
Inspection from the inside |
Emission direction
Centre frequency
Nb of elements |
radial or angled
8 MHz to 18 MHz
64 to 128 |
Tube dimension
Cracks location
Cracks type |
Small tubes down to 12mm ID
ID and OD
circumferential
wall thickness measurement |
|

 Circular
phased array probes


